top of page
Search

Remember those days when you had to strategically position yourself near the router to get a decent Wi-Fi signal? Or worse, deal with frustrating dead zones that killed your productivity or entertainment? Thankfully, those days are fading fast, thanks to the magic of Wi-Fi repeaters.


If you've landed here, you're likely looking to set up a repeater using the IP address 192.168.188.1. You've come to the right place. This guide will walk you through the process, even if you're not a tech whiz.


What's a Repeater and Why Do You Need One?


Think of a Wi-Fi repeater as a bridge that extends your existing network's reach. It grabs the signal from your main router and rebroadcasts it, effectively eliminating dead zones and providing a stronger connection to devices further away.


Here's why you might need one:

  • Eliminate Dead Zones: Say goodbye to those frustrating areas where your Wi-Fi signal disappears.

  • Extended Coverage: Increase your network's range to reach every corner of your home or office.

  • Improved Signal Strength: Enjoy a more stable and reliable connection for all your devices.


Setting Up Your 192.168.188.1 Repeater: A Step-by-Step Guide


1. Connecting Your Repeater


  • Plug it in: Connect your repeater to a power outlet in a location where it can receive a good signal from your main router. Ideally, this should be about halfway between your router and the area with a weak signal.

  • Initial Connection: Connect your computer or smartphone to the repeater's Wi-Fi network. You'll usually find the default network name (SSID) on the repeater's label or in its manual.


2. Accessing the Repeater's Configuration Page


  • Open a Browser: Launch your preferred web browser (Chrome, Firefox, Safari, etc.).

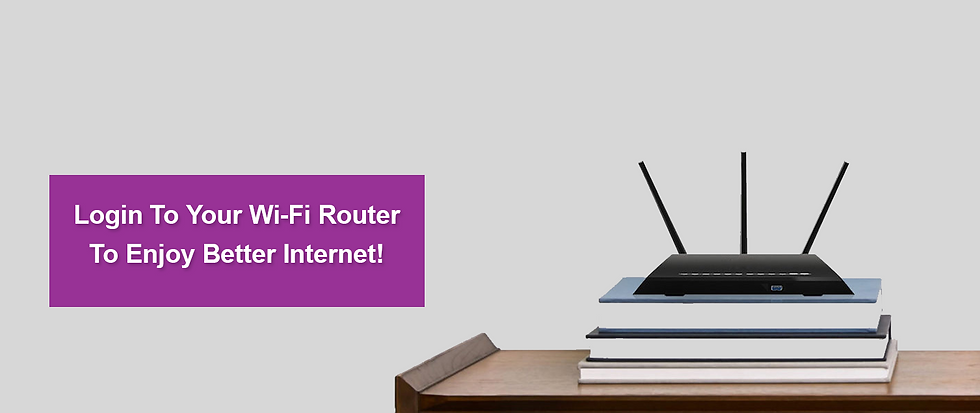
  • Enter the IP Address: In the address bar, type 192.168.188.1 and press Enter. This should take you to the repeater's login page.

  • Log In: You'll be prompted for a username and password. Check your repeater's manual for the default credentials (often "admin" for both).


3. Configuring the Repeater


  • Scan for Networks: Once logged in, you should see an option to scan for available Wi-Fi networks.

  • Select Your Network: Choose your main router's network from the list.

  • Enter Password: Enter the password for your main Wi-Fi network.

  • Set Up Repeater Network: You might be able to customize the name (SSID) and password for your repeater network. This is a good idea to avoid confusion.

  • Save Settings: Apply the changes and wait for the repeater to reboot.


4. Connecting to the Extended Network


  • Find the Network: On your devices, look for the extended network name (either the same as your main network or the one you customized).

  • Connect and Enjoy: Enter the password and connect to the extended network. You should now have a stronger and more reliable Wi-Fi signal in those previously problematic areas.


Tips for Optimal Performance


  • Placement Matters: Experiment with different locations for your repeater to find the sweet spot with the best signal reception.

  • Avoid Obstacles: Walls, large furniture, and electronic devices can interfere with the Wi-Fi signal.

  • Update Firmware: Keep your repeater's firmware up to date for optimal performance and security.

  • Read the Manual: Always refer to your repeater's manual for specific instructions and troubleshooting tips.


Troubleshooting


  • Can't Access the Login Page? Double-check the IP address, ensure you're connected to the repeater's network, and try a different browser.

  • Repeater Not Working? Make sure it's receiving a good signal from the main router, and try resetting it to factory defaults.

  • Still Having Issues? Consult your repeater's manual or contact the manufacturer's support.


Conclusion


Setting up a Wi-Fi repeater might seem daunting, but it's a straightforward process that can significantly improve your network experience. With this guide, you should be well on your way to conquering dead zones and enjoying seamless connectivity throughout your space.


In the digital age, a robust and reliable Wi-Fi connection is paramount. Dead zones and weak signals can be incredibly frustrating, but there's a solution at hand. Enter 192.168.188.1, the gateway to a seamless wireless extender setup that will transform the way you experience connectivity.


ree


Understanding the Need:


In a world where we're more connected than ever, having a strong Wi-Fi signal throughout your home or office is essential. However, it's not uncommon to encounter those pesky dead zones where the Wi-Fi signal seems to vanish into thin air. This is where a wireless extender can work wonders.


The Role of 192.168.188.1:


192.168.188.1 is more than just a string of numbers; it's your ticket to eliminating those Wi-Fi dead zones. This unique IP address allows you to access your extender's settings, making it possible to extend your network coverage effortlessly. Whether it's a large home or an office with multiple rooms, this setup provides a solution for everyone.


Step-by-Step Setup:


  • Setting up your wireless extender with 192.168.188.1 is a straightforward process. Here's a brief overview:


  • Plug in Your Extender: Begin by plugging in your wireless extender and ensuring it's within range of your existing Wi-Fi network.

  • Connect to 192.168.188.1: Open your web browser and enter http://192.168.188.1 in the address bar. Hit Enter, and you'll be prompted to log in.

  • Enter the Credentials: Use the default username and password provided in your extender's manual to log in.

  • Configuration: Follow the extender's setup wizard to configure your extender to connect to your existing Wi-Fi network.

  • Placement: Position your extender strategically to maximize coverage and minimize dead zones.

  • Enjoy Seamless Connectivity: With the extender in place, enjoy uninterrupted and fast Wi-Fi coverage throughout your home or office.


Troubleshooting and Optimization:


If you encounter issues during the setup or want to optimize your network further, 192.168.188.1 provides you with the tools and options to do so. You can fine-tune settings to ensure the best performance and troubleshoot any potential problems.


Conclusion:


192.168.188.1 wireless extender setup is your key to achieving a robust and reliable Wi-Fi network. Say goodbye to dead zones and welcome seamless connectivity into your digital life. Whether you're streaming, working, or simply browsing the web, this setup ensures that your connection is always strong and dependable. Explore the power of 192.168.188.1 and experience a new level of connectivity today.


ree

To deal with day-to-day internet issues, one needs to invest in high-quality routers and extenders. With the right guidance, you can easily set up these devices at your home or workplace. Fill in the right IP address - 192.168.188.1 wifi repeater, and you will reach the login admin of the extender without wasting any time. If you are a first-time user, then you might need some professional help to tackle the extensive issues. But by following this effective guideline, you can manage the minor problems related to set up, connectivity, coverage, and more.


Wifi Extenders Basics For The Beginners!


Whether you have plans to watch a movie on Netflix online or just need to arrange an online meeting with your colleagues, or just want to play online games, an extender can be your best friend in all good and bad times. No one wants to deal with weak internet access, and the extender will manage to give you better coverage. You can buy an extender if you want to have a strong Internet connection throughout your home.


How Do Wifi Extenders Work?


When it comes to working on the extenders, these devices start with receiving signals from the router and amplify them before broadcasting them to all directions. This will result in covering all the corners at your home or workplace. Hence you don’t need to worry about losing signals while walking from one room to another. By installing and locating the extenders at the right place, you can get optimum results in terms of internet access even when you want to use them on your balcony or patio.


Believe it or not, extenders are meant to expand the coverage of your signals which are far better than the routers. This can be the best possible solution to enhance your wifi range within the required budget. It is small in size, so you don’t need to hassle much. Plus, you will get stronger signals without putting in much effort.


Things To Remember!


You need to know the fact that wifi extenders can only boost your existing signals but are not meant to make your connection faster. It will depend on your internet plan or the internet service. Hence if you want a better overall wifi speed, then you need to consider upgrading your devices for the same or just go for changing your internet plans.


Once you install the device successfully, make sure you keep an eye on the device settings. If these are weak on a continuous basis, then try to switch off your device for a while and then switch it on. You might see the difference. The thing is, your phone or laptop might not recognize the wifi extender as it will stay connected to the router as a default device.


Wrapping up, using the 192.168.188.1 wifi repeater setup details make it easy to tackle different errors without any hassle. Make sure to follow the right guidelines without forgetting any single step. Start with locating the extender at the best place so that you can desire favorable results.


©2023 by Jeff Sherman. Proudly created with Wix.com

bottom of page